
Egg Creatures
Dyeing for a new way to decorate Easter eggs? Here's a recipe for fun that's hard to beat: With basic crafts supplies -- crepe paper, pipe cleaners, felt, yarn, thread, and glue -- kids can make cows, pigs, and lots of other eggs-traordinary creations from plain white eggs.
INTRODUCTION
Quail eggs (look for them at specialty grocers) are the right size for smaller animals (paint works better than dye to color their spotted shells). And brown eggs are a natural choice for creatures with dark fur or feathers.
MATERIALS
- Utility knife
- Paper clip
- Paper towels
- Ear syringe
- Dyeing mixture: 1 teaspoon vinegar, 20 drops food coloring, and 1 cup warm water
- Homemade drying rack of pins and foam board
- White glue
- Tempera paint or marker
- Egg creature templates
STEPS
Steps 1
Emptying eggs lets you save your creations. An adult should pierce egg at both ends with a utility knife, widening one hole a bit. Poke a straightened paper clip through wide hole; stir yolk. Place ear syringe in smaller hole; squeeze. Contents will pour out. (Wash hands well.)
Steps 2
It's easy to make dye: Cover the work area with paper towels. In a jar, mix 1 teaspoon vinegar, 20 drops food coloring, and 1 cup warm water. Submerge the egg (keep it down with a paper cup containing water). Soak 5 minutes for light colors and 10 minutes for darker shades. Remove the egg with tongs. A homemade rack of pins and foam board makes for even drying and quick cleanup.
Steps 3
Dye or paint should be fully dry before beginning. Affix features with white glue (on crepe paper, use tiny dots of glue); let dry at least 20 minutes. Glue on feet or legs first so egg will stand. For ears and combs, dab glue on edge of felt or crepe paper, affix piece, let dry, then fold up. Add small details like eyes with tempera paint or a marker.

Steps 4
Ladybugs who lunch don painted-on faces and construction-paper attire (dots are made using a hole punch). Each pair of legs is one piece of yarn glued underneath; antennae are embroidery floss dipped in glue and dried to stiffen.
Steps 5
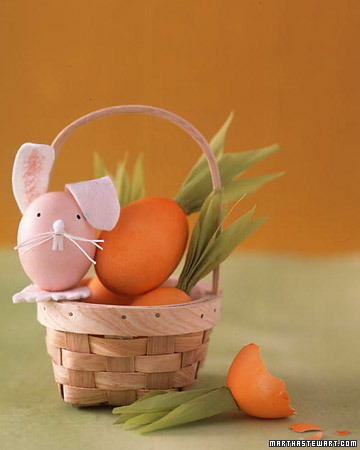
Why is this bunny so chubby? From munching crepe paper-topped carrots! He's a bit harebrained but has fine felt ears, teeth, and feet (a hole cut in the center of his feet keeps his body standing up). Twitching a pom-pom nose and embroidery-floss whiskers, he finishes his snack.

Steps 6
How now do you make a brown cow? With brown eggs, of course. An udderly adorable calf starts out as a speckled quail egg, and a pair of Holsteins gets their spots from black paint. All have crepe-paper features and embroidery-floss or yarn tails. Use a piece of pipe cleaner (add spots with a marker) for each pair of legs.

Steps 7
This mama and her round little piglet are pretty in pink touches, fresh out of the carton -- but not for long! They're headed to a cool puddle of construction-paper mud as fast as their pipe-cleaner legs (bent into a V) will carry them. For the nose, glue on a button (use tape to secure while glue dries, then gently peel off). To make the curly tail, run a thumbnail along one side of plain embroidery floss.
Steps 8
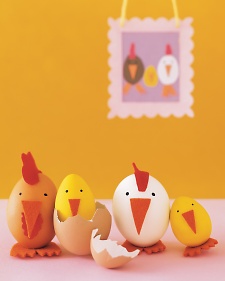
This brood is all smiles, er, beaks as they pose for a family portrait to welcome their latest addition. (The photo hanging behind them was taken before the baby was born.) Mr. Rooster crows that his new son is a good egg, and Mrs. Chicken is pleased that both children inherited the family's felt features.
Steps 9
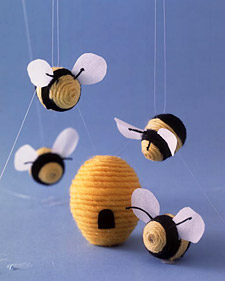
These insects are spinning a yarn about how they came to bee: Glue the end of a strand of yellow yarn to the tip of a quail egg. Once dry, coil the yarn around the egg, alternating yellow and black sections, and gluing as you go. Glue on the wings and antennae, tucking between the strands with a toothpick. For the hive, use a regular egg; the door is cut from felt. Use poster putty to make the hive stand up.